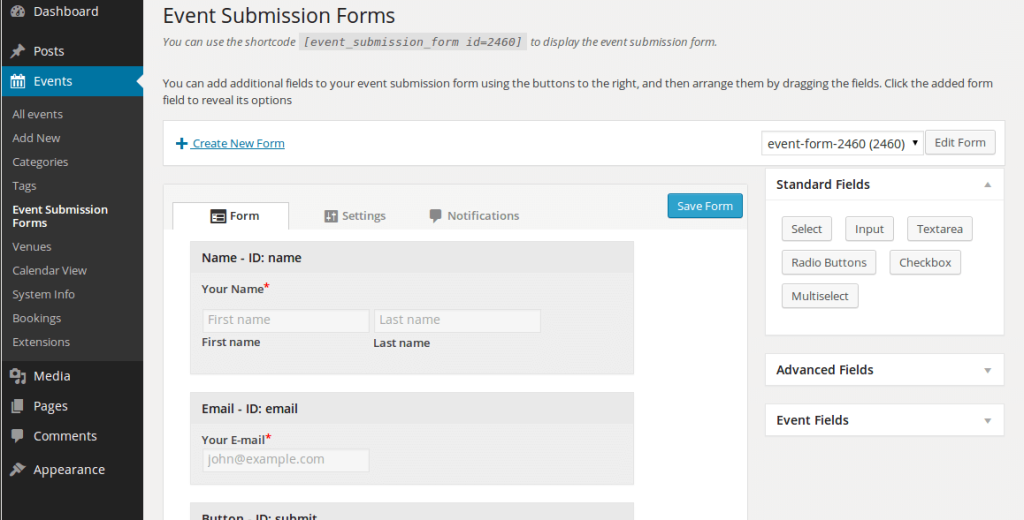
To create an event submission form go to Events > Event Submission Forms.
Here you’ll find an event submission form has already been created and pre-populated with some required fields (also called ‘elements’):
- Submitters name & e-mail address (visible only if they are logged in, you can also disable guest submissions).
- Event start and end date
- The “Submit” button
Add an element
You can add an element by clicking the appropriate form element on the right hand side. The elements are grouped into three sections:
- Standard – These are the basic form fields, such as number/text input and option selection. You can assign these a custom field key.
- Advanced – These are a mix of form fields with a specific purpose (e.g. e-mail, anti-spam and terms and conditions), and more advanced elements such as WordPress ‘hooks’ and raw HTML input.
- Event details – These are form fields which relate to the event’s details such as fields for title, description, featured image, recurrence schedule etc.
Arranging your form
You can drag fields in the form to any desired order. If you have added a fieldset, you can drag elements “beneath it” (so that they sit underneath it and slightly to the right), and these elements will appear inside that fieldset.
Form element settings
My clicking the field element you can reveal any relevant options for that element. They’ll be some options specific to that element type, but most will include:
- Label – The label of the field
- Required – Indicating whether user-input for this field is required
- Description – An optional description to provide clarification for the purpose of the field
- CSS classes – Any classes you may wish to apply to the field.
When finished…
When you form is ready, click save to save any changes you’ve made. You may wish to check over the form settings beforehand. Lastly, if you haven’t done so already, you’ll want to create a page to display your submission form.

