
To add tickets to an event you need to install Event Organiser Pro alongside Event Organiser. If you haven’t done so already, you can purchase Pro here: wp-event-organiser.com/pricing.
1. Check booking / gateway settings
Before creating tickets for your event there are a few options that need to be considered. In your WordPress admin (Settings > Event Organiser > Bookings) you can select the following (they are discussed in greater detail on the “Selling Your First Ticket” page).
- Recurring events – are you selling “by date” (e.g. for a gig) or “by series” (e.g. places on a course)
- Currency – if you’re selling tickets, you should select the appropriate currency (and ensure it is supported by the payment gateway you have elected to use)
- Gateway settings – Pro provides PayPal and offline payment gateways by default. Support for other gateways (including Stripe) is available via extensions (which are included for free in with the Developer licence). View all available gateways.. Each gateway will have its own requirements, and you should ensure the gateway is set to either ‘live’ or ‘sandbox’ (for testing). Details on how to set up each gateway is available on the gateways page.
There are other settings available, for more details see the “Selling Your First Ticket” page).
2. Create a ticket
Go to your event’s admin page and find the “Bookings” metabox. Click Add Ticket. In the panel that appears you can specify
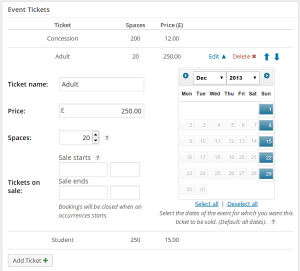
- Ticket name – appears on the booking form
- Price – leave blank for free
- Spaces – The number of tickets available
- Sale period – (Optional) When the tickets come on and off sale. If these are blank tickets will be available for purchase immediately, and until the event starts.
- Occurrences – If selling tickets ‘by date’ you can sellect which occurrences the ticket is for (by default, all of them). This allows you to create a ticket which can only be purchased for a specfic few occurrences.
And that’s it! The booking form will now appear whenever there are tickets on sale.
3. Adding fields to the booking form
If required, you can also dd additional fields to the booking form to collect information from those attending your event. This information can be downloaded along with other details of the booking. Find out more about adding fields to the booking form.