
This page provides a guide on how to sell your first ticket (it assumes you’ve already created your event!).
Step 1: What are you selling?
Before creating your first ticket there are a couple of settings you may want to look over in Settings > Event Organiser > Bookings, but if you have recurring events an essential one is: For recurring events, what are bookings for? The bookings option allows you to sell tickets
- By date – When selling ticket the bookee selects a particular date for which they are attending (e.g. like a gig)
- By series – You are a selling ticket for the entire event series. That is the tickets if for all the dates of the event (e.g. like registering a place on a course).
You shouldn’t change this option while selling tickets for an event as it may upset the capacity calculations, resulting in an overbooked event. If you’ll never sell tickets for recurring events, then you don’t need to worry about this option.
There are other options you may wish to look over, these are detailed on the Booking Options page.
Step 2: (Optional) Setting up the gateways
This step is only required if your tickets will be priced. If all your tickets shall be free then you can ignore this step.
First you should set the currency in which you shall sell your tickets. Next you’ll need to enable and set-up at least one gateway. If you enable multiple gateaways, the bookee can select their preferred method when placing their booking. By defaul there are two gateways available:
- PayPal (standard)
- Offline
but there are other gateways available (e.g. Stripe). For a complete list as well as details on how to set-up each gateway, see the Gateways page. The default gateways are the easiest to set up. PayPal simply requires the e-mail address of your PayPal account (with other optional settings available). The offline gateway just needs you to provide instructions to display to the bookee on the booking form.
Step 3: (Optional) Creating custom booking fields
Event Organiser allows you to add additional fields to the booking form to collect information specific to your needs. For example you may want bookees to provide a t-shirt size, meal preference or other information. You can easily create and edit booking forms using the booking form customiser. When you’re ready you download all bookings, along with this collected information, in a CSV file. (See Step 7: Download booking data and tickets )
Step 4: Creating your tickets
On your event’s admin screen scroll down to the Event Tickets section. Here you can add, edit and remove tickets. The various options that are available to you when configuring your ticket can be found on the Ticket Options page. Please note that tickets must have a positive number as a quantity (0 does not mean unlimited).
Step 5: (Optional) Selecting your booking form
If you have only one booking form, or skipped step 3 then you canignore this step. In step 3 you may have created or edited a specific form to include additional fields for your bookees to fill out when placing a booking. Use the drop-down menu below the ticket table in your event’s admin screen to select the desired to form to use for this event’s bookings.
Step 6: Testing a ticket sale
Now everything is set up you should test that there are no issues with placing bookings and (if required) making payment. First ensure that the tickets appear on the front-end. Tickets will not appear if any of the following apply:
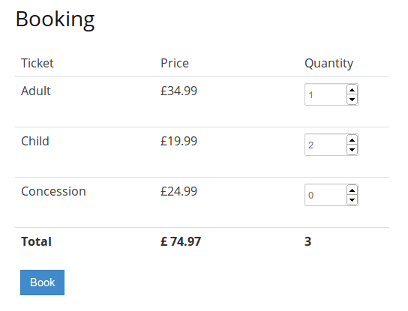
Booking form with the Sigma Theme
- The ticket is not currently on sale (see Ticket options page)
- The event has passed (a notice will appear instead)
- The event is fully booked (a notice will appear instead)
- The ticket quantity is 0 (Ticket quantity must be a positiver number)
If you want to test the payment of a booking you should set your gateways to sandbox mode and have supplied valid sandbox credentials. Details on how to set up the gateways, and in particular how to obtain the required credentials can be found on the Gateways page).
After the sale…
Once you have finished collecting bookings for your event you will probably want to download a list of attendees. If you added additional fields in step 3 via the booking form customiser then you may also want to download this information along with the bookings. Event Organiser lets you download a list of all tickets sold and a list of bookings made into a convenient CSV format. Details can be found on the Exporting booking data and Managing your bookings pages.
You may also wish to e-mail bookees. To do this, go to Events > Bookings, select the relevant bookings and then select Email Bookees from the drop-down menu at the top and click apply. A form appears allowing you to provide a subject and e-mail content. Both may contain ‘placeholder tags’ which are replaced as appropriate for each booking. For example, %first_name% will be replaced by the first name of the bookee. For a full list of available placeholders see the E-mailing attendees page.
To e-mail attendees to a certain event first filter the bookings table by event and/or booking status, before checking the select all checkbox at the top of the column. This selects all bookings on that page, so you may wish to adjust the number of bookings on a page via the screen options at the top-right.